28 April 2011

I Need More... Words [Little Princes]

I have never reviewed a book on my "craft" blog before.  I'm not even sure if anyone pays attention to my silly entries, but if anyone out there is listening...


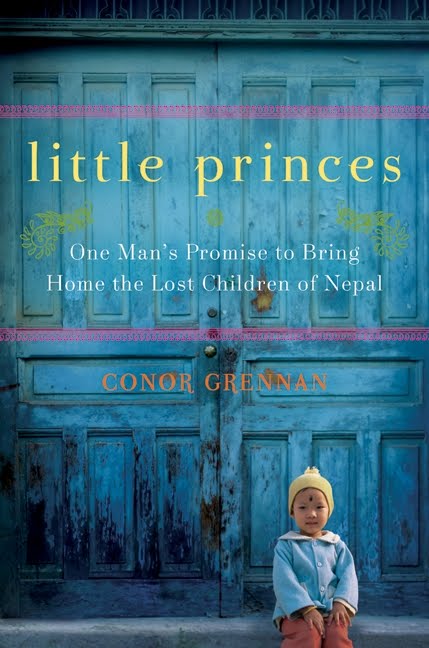
I recently devoured a book called Little Princes: One Man's Promise to Bring Home the Lost Children of Nepal by Conor Grennan.  Within its pages is an account of one man's journey to find himself by taking a brief hiatus from a career to "self-indulgently" travel the world.  What he discovered on this journey could not have been farther from the experience he had originally planned.  Grennan fell deeply in love with the orphaned children of Nepal and was moved by their seemingly hopeless situation - lost, poverty-stricken, voiceless and afraid.  He and a very small handful of friends began fighting the tide of child trafficking, a dangerous prospect in this remote part of the world.  His story is remarkable and his work continues to this day.


Dust off your library card if you must, but buying this book is better!  A portion of all book sales support Next Generation Nepal, the non-profit organization that Conor Grennan established to reconnect trafficked children with their families in Nepal.


REVIEW PROS: It will tug at your heartstrings and, hopefully, move you to action.
REVIEW CONS: It may not be the most eloquent piece of literature ever published, but the story is compelling.  You will weep.
RATING: 4/5

19 April 2011

I Need More... Picnics [Have you seen this??? Tiffin Box]

Come on!  This has to be the cutest picnic "basket" ever.  Can't you just image my super-stylish spring picnics in the park?  Me, in a June Cleaver cotton dress complete with crinoline petticoat, my daughter, gathering armfuls of dandy lions, darting back to our blanket only to snag a cucumber tea sandwich from our tiffin box.  I have to wonder... would Yogi Bear tear right into the lunch inside or would he, like me, just stare happily at it's design?


Target, Tiffin Box, aqua link or yellow swirl, $24.99


REVIEW PROS:  It's the perfect size for a generous lunch.  It saves the earth from another jumble of plastic sandwich bags.  It's top-rack dishwasher safe.  It makes the user look hip.
REVIEW CONS: The compartments do not  have an airtight seal.  I know full well that my daughter will eventually find a way to pack her treasures into it and persuade me (with puppy dog eyes) to keep it.
RATING: 4/5

07 April 2011

I Need More... Hairclips [The tinier the better!]

I love, love, love tiny things.  Always have.  I, of course, had a dollhouse growing up and my favorite part of it was the chimney.  Not just the chimney, but the teeny tiny bricks that covered it.  (I can still remember glueing them on with my mother and smearing the mortar between them...)  Get it?  I love little things.


I was growing a bit tired of my daughter's hair clips and stumbled across two new ideas on the web.  Let me tell you, these are cute as they come!  But the best part of these two new clips?  They're tiny!  Which makes them extra cute in my book.  Give them a try - they're super easy, too!  Here are photos of my versions of their fantastic ideas.
The Accidental Crafter: Ramblings of a Wannabe Crafter and Mother
Felt Flower 
My notes: For a flower this small, invest in the Cuttlebug die cut that they recommend!  Free-handing something this tiny is a hot mess.  The die cut set comes with four flowers and I used the largest flower (1.5-inches) for the petals and the smallest (0.75-inches) on the back to cover stitches.  Adhere with a dot of hot glue.  If you do not have a die cutting machine - never fear!  This "flower" could be made with felt circles, too.
Little Jenny Wren: Life and Dolls
Pinwheel Bobby Pin
My notes: My square measured 1.5-inches.  I used HeatNBond to fuse the fabrics together and a clip rather than a bobby pin.  Just as above, I glued a small felt circle to the back to cover stitches.

I Need More... Jewelry [The Charm of Young Women]


I have been involved in my church's Young Women program for the better part of my adult life and have loved every minute of it!  Last fall, I was released from my calling/job and found myself sorting through all of the YW goodies that I had collected up to this point.  It struck me that I had completed the Young Women Personal Progress program (designed to bring young women closer to Jesus Christ through personal study, learning experiences, and meaningful projects) almost FOUR times in my lifetime.  I can only hope that I learn a little something new each time.  :)  But, I found myself with quite a few medallions and charms - awards for progress - in my jewelry box.  What to do?  What to do?  I rarely wore any of the  medallions alone as necklaces, but would I wear them if they were brought together in charm bracelet form?  YES!  So, here is how I [stylishly] wear my Young Women tokens now.  What do you think?


P.S.  There is one more charm destined for my bracelet.  The Honor Bee.  (See the gaping hole?)  It is a darling little bumble bee that is awarded when you've completed the program and have worked another 40 hours above and beyond.  (I personally think that I've earned that by now, but my current ward leadership thinks otherwise.  Boo!  I guess I'll just have to wait until the next time I'm called to work with the young women!)

I Need More... Peeps [Peeps, peeps, everywhere!]

Halloween may seem to have the lock on candy, but not in my world.  It's Easter.  Come on.  Chocolate bunnies, robin's egg malt balls, super stale marshmallow Peeps, and the tooth-achingly perfect Cadbury Egg?  Really, Halloween?  Really?  You've got nuthin' on Easter confections!

PEEPS GARLAND
So, to celebrate my love of Easter sweets, my home dec centered around the all-mighty Peep this year.  I made about a billion felt Peeps to string into garlands.  (A lucky few even received them tied to the real thing as gifts.)  The garland came from the Dana Made It blog.  See it here.  FYI:  I used a 15 ft. spool of gingham ribbon per 13 felt bunny Peeps, leaving plenty of extra ribbon on the ends for hanging.


WREATH
I then grabbed the glue gun for a session with a styrofoam wreath and several boxes of Peeps.  Here is the basic tutorial.  Although, it was so simple, that a tutorial seems admittedly silly.

Supplies:
Styrofoam wreath, about 12-inch
Ribbon
Straight pins
Hot glue gun and glue sticks
Peeps, just shy of three boxes

How to:
1. Behind the wreath, pin down one end of your ribbon.  Wrap the wreath in ribbon, overlapping edges slightly to hide any signs of styrofoam.  Pin the ribbon now and again with straight pins to keep the ribbon from slipping.

2. Glue your Peeps, side by side, into place.  Just squish them close together, until you've completed your circle.

3.  Pin a loop of ribbon to the back of the wreath and hang it proudly.

4. Resist the urge to eat these uber-stale Peeps when the holiday is over.  Stale may be good, but that's just gross.